Groups and Colors
You can specify different node groups as well as link groups in HUGIN which can be used to group nodes and links of a network. Each group has assigned a color so that in the display of the network it is easy to distinguish nodes and links of different groups. You can specify/edit the node groups and link groups of your network in the Groups and Colors tab of the Network Properties dialog box.
Node Groups To modify the node groups of the current network open the the Network Properties dialog, navigate to the ‘Groups and Colors’ tab followed by the ‘Node Groups’ tabs as shown in Figure 1.
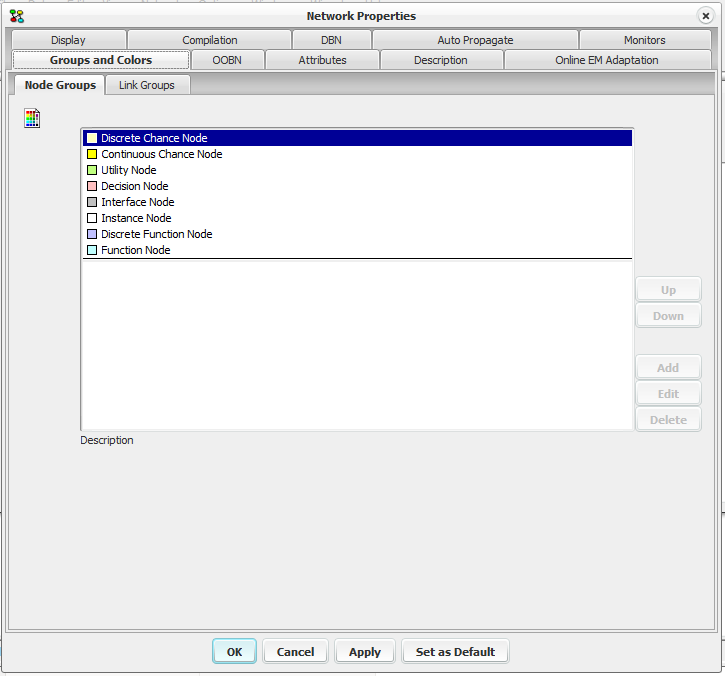
Figure 1: The Network Properties dialog box showing the Node Groups tab.
When you use HUGIN, you always use eight default groups (maybe without recognizing them as groups). Each of the different types of nodes have their own default group: discrete chance nodes, continuous chance nodes, utility nodes, decision nodes, interface nodes, instance nodes, discrete function nodes, and finally function nodes.
You add a new (user defined) group by clicking the ‘Add’ button and specifying a group name and a group color in the pop-up window. You can also rename a group, delete it, or move it up and down in the node groups list. For the eight default node groups you are allowed to alter the color only.
At the bottom of the Groups and Colors tab, you can add a description to the currently selected user defined node group.
Node Groups The modification of link groups is similar to modification of node groups. Select the ‘Node Groups’ tab as shown in Figure 2.
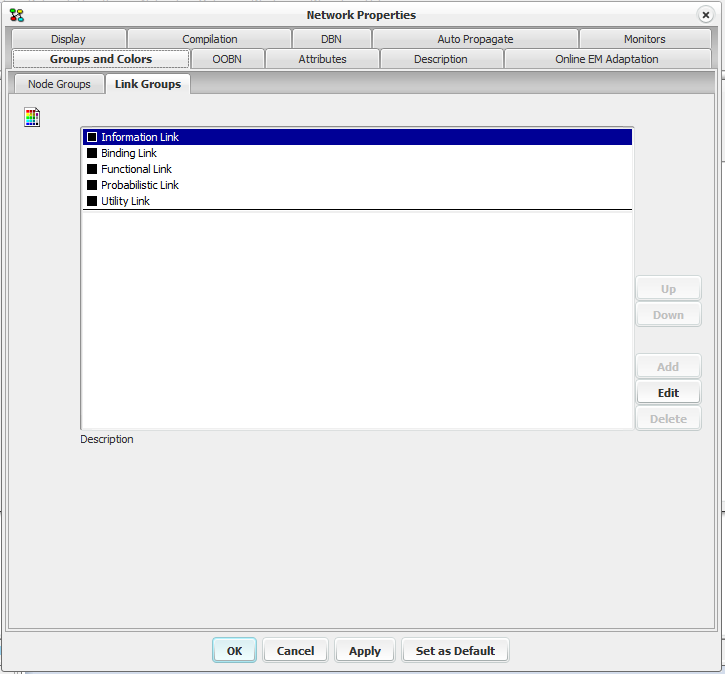
Figure 2: The Network Properties dialog box showing the Link Groups tab.
The node group named ‘Default Link’ is the group a link belongs to when it has not been assigned any other group. For this link group you are allowed to change the color. User defined link groups are added to, modified in and deleted from the list below. To add a new link group click the ‘Add’ button and fill in a name and select a color in the pop-up window. You can rename a group, delete it, or move it up and down in the link groups list. Use the description field to enter your own description of any selected user defined link group.
Assigning selected Nodes or Links to Groups You can assign one or more nodes or links in the Network Pane to a group by selecting them (hold down shift and left-click on the links or nodes you wish to select) and clicking the right mouse button which opens a menu. From this menu, use the Assign to Group item to assign the selected nodes or links to a group. The menu is shown in Figure 3. This way you can also remove a number of selected nodes or links from a specific group by selecting the No Group sub item of the Assign to Group item.
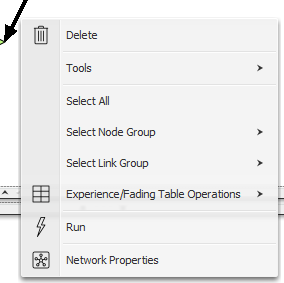
Figure 3: Menu showing the two menu items ‘Select Node Group’ and ‘Select Link Group’.
Note that you cannot assign nodes to link groups or links to node groups, so when a number of links are selected the menu allows you to assign them to a link group and when a number of nodes are selected the menu allows you to assign them to a node group.
You can only assign nodes or links to groups in Edit Mode.
Once, a number of nodes or links have been assigned to a group all the nodes or links of this group can be selected in one operation by clicking the right mouse button which opens a menu. From this menu, use the Select Node Group item to select a node group or use the Select Link Group to select a link group.
Node groups can be selected in this way in both Edit Mode and Run Mode, while links can only be selected in this way in Edit Mode.
Back