Data Processing
Data Processing is the task of applying a set of transformations to the data items in a data set. Data Processing functionallity is available using the data processing tool, which can be launched from the right-click context menu in the data matrix.
The information used to perform a transformation is called a data processor description. Using the data processing tool, one can define data processors as well as applying them. The tool supports loading and saving data processor descriptions, which is useful for dealing with different data sets that require the same transformations to be usable in HUGIN.
The data processing tool is displayed
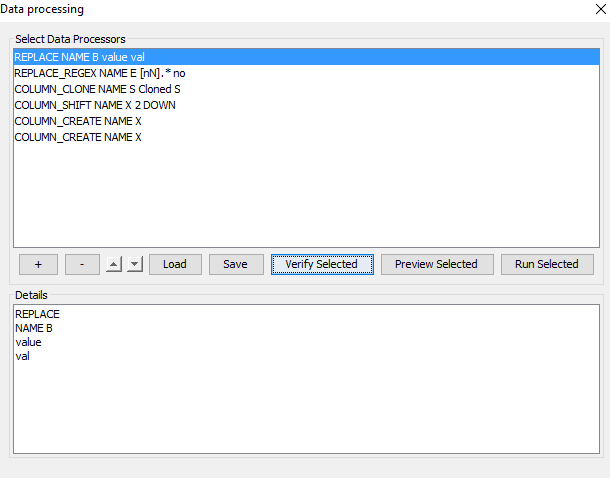
Figure 1: The data processor tool - a number of data processor descriptions has been loaded. The top half of the window contains a list of data processors. When a data processor is selected, the description can be edited in the details text field located in the bottom half of the window.
Use the function buttons ‘+’ and ‘-’ to create and delete data processors and the arrow buttons ( \(\blacktriangle\) and \(\blacktriangledown\)) to rearrange currently selected data processors. Use the load and save buttons to store data processor descriptions in files. One has the option to save all data processors or only selected when clicking the save button, see Figure 2.

Figure 2: Save all or selected data processors
Use the ‘Verify Selected’ button to get an overview of possible problems with the selected processors and use the ‘Preveiw Selected’ button to see the result of the currently selected processors on the first 200 rows. It is recommended to use these tools before applying a data processor, to see how it performs. Click the ‘Run Selected’ button to apply a data processor.
Data Processor Descriptions
A data processor description is a list of text lines, containing three pieces of information: the data processor type, a column specifier and any parameters for the data processor:
<data processor type>
<column specifier>
<argument>*
The data processor type can be one of:
REPLACE
REPLACE_REGEX
TO_UPPER
TO_LOWER
DISCRETIZE_MANUAL
DISCRETIZE_EQUAL_DISTRIBUTION
DISCRETIZE_IEM
COLUMN_DELETE
COLUMN_CREATE
COLUMN_CLONE
COLUMN_SHIFT
The column specifier can select a single column based on the column name:
NAME <column name>
Or a set of columns where the column names matches a regular expression (regular expressions described further below):
SELECT <regular expression>
The arguments depend on the chosen data processor type:
REPLACE:
<match text string>
<replacement text string>
REPLACE_REGEX:
<regular expression>
<replacement text string>
TO_UPPER: none
TO_LOWER: none
DISCRETIZE_MANUAL: The intervals, specified as a list of interval boundaries:
<lower bound first interval>
<upper bound previous interval/lower bound next interval>*
<upper bound last interval>
DISCRETIZE_EQUAL_DISTRIBUTION: The number of target intervals:
<number of states>
DISCRETIZE_EQUAL_DISTRIBUTION: The number of target intervals:
<number of states>
DISCRETIZE_IEM
<column name>
COLUMN_DELETE: none
COLUMN_CREATE: none
COLUMN_CLONE
<new column name or prefixes>
COLUMN_SHIFT
<rows to shift>
<direction to shift>
Regular expressions
A regular expression is a pattern used to match a sequence of characters. The pattern matching rules used in HUGIN follow the java regular expressions pattern matching from java.util.regex.Pattern.
A summary of selected regular-expression constructs:
Characters
x       The character x
\\      The backslash character
Character classes
[abc]           a, b, or c (simple class)
[^abc]          Any character except a, b, or c (negation)
[a-zA-Z]        a through z or A through Z, inclusive (range)
[a-d[m-p]]      a through d, or m through p: [a-dm-p] (union)
Predefined character classes
.       Any character
\d      A digit: [0-9]
\D      A non-digit: [^0-9]
\s      A whitespace character: [ \t\n\x0B\f\r]
\S      A non-whitespace character: [^\s]
\w      A word character: [a-zA-Z_0-9]
\W      A non-word character: [^\w]
Greedy quantifiers
X?      X, once or not at all
X*      X, zero or more times
X+      X, one or more times
Logical operators
XY      X followed by Y
X|Y     Either X or Y
(X)     X, as a capturing group
The backslash character (’') serves to introduce escaped constructs, as defined in the table above, as well as to quote characters that otherwise would be interpreted as unescaped constructs. Thus the expression \ matches a single backslash and { matches a left brace.
Examples of regular expressions:
[n].*           Match any string that begins with the character 'n', e.g. 'not', 'nothing' etc.
\d+(\.\d*)?     Match any string that is a number, on the form 1 or 1.234 etc.
Creating a Data Processor
Click the ‘+’ button to create a new data processor, the dialog in Figure 3 appears.
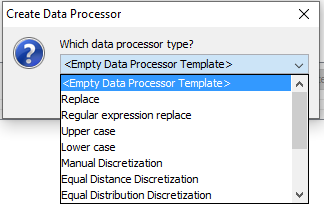
Figure 3: Select a data processor type
To manually enter a data processor description, choose the empty template.
To create a new data processor using a guided approach, select any of the data processor types.
The guided approach consists of a sequence of questions and finally automatic generation of the resulting data processor description. After choosing a data processor type, one must select a target column in the data set. See Figure 4.
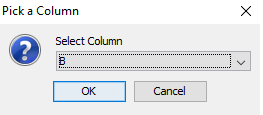
Figure 4: Select target column for the new data processor
Data Processor: Replace
This data processor replaces any data items that matches a specific text string, with a replacement text string. The REPLACE data processor takes two parameters, the text string to match and the replacement text string.
REPLACE
NAME <column-name>
<match text string>
<replacement text string>
When creating the data processor using the guided approach, specify parameters in the dialogs in Figures 5 and 6.

Figure 5: Enter the text string that should be replaced - any data items that matches the string ‘value’ will be replaced

Figure 6: Enter the replacement text string - replace any data items that matches ‘value’ with ‘val’
Data Processor: Regular expression replace
This data processor is similar to the normal REPLACE data processor, except that data items are matched using a regular expression instead of a fixed text string. The REPLACE_REGEX data processor takes two parameters, the regular expression used to select matching data items and the replacement text string.
REPLACE_REGEX
NAME <column-name>
<regular expression>
<replacement text string>
When creating the data processor using the guided approach, specify parameters in the dialogs in Figures 7 and 8.
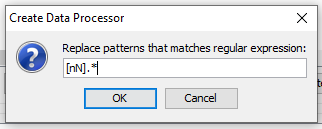
Figure 7: Enter a regular expression that matches the desired data items - this regular expression matches any data item that begin with a lower- or uppercase n

Figure 8: Enter the replacement text string - replace any data items that matches the regular expression with ‘no’
Data Processor: Upper case
This is a very simple data processor, which converts any lower case characters to upper case. The TO_UPPER data processor has no parameters.
TO_UPPER
NAME <column-name>
Data Processor: Lower case
This is a very simple data processor, which converts any upper case characters to lower case. The TO_LOWER data processor has no parameters.
TO_LOWER
NAME <column-name>
Data Processor: Manual Discretization
This data processor applies a discretization to all data items. The DISCRETIZE_MANUAL data processor takes a variable number of parameters, namely target intervals specified as a list of interval boundaries:
DISCRETIZE_MANUAL
NAME <column-name>
<lower bound first interval>
<upper bound previous interval/lower bound next interval>*
<upper bound last interval>
When creating the data processor using the guided approach, the discretization tool is spawned to aid specifying the intervals.
Data Processor: Equal Distribution Discretization
This data processor applies a discretization to all data items. The target intervals are dynamically generated based on all the numeric data items in the column, such that each interval contain approximately the same number of data items. The DISCRETIZE_EQUAL_DISTRIBUTION data processor takes a single parameter, the number of target intervals.
DISCRETIZE_EQUAL_DISTRIBUTION
NAME <column-name>
<number of states>
When creating the data processor using the guided approach, specify parameters in the dialog in Figure 9.

Figure 9: Specify the number of intervals
Depending on how well the data values are scattered, the number of intervals may be pruned in order to make the resulting intervals equally distributed.
Data Processor: Information Entropy Minmization Discretization
This data processor applies a discretization to all data items. Target intervals are generated that minimizes entropy in an other discrete column (the target column). The DISCRETIZE_IEM data processor takes a single parameter, the target column on which to minimize the entropy (discrete valued).
DISCRETIZE_IEM
NAME <column-name>
<target column>
When creating the data processor using the guided approach, the target column is selected in the dialog in Figure 10.
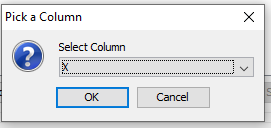
Figure 10: Specify the target column on which to base the entropy minimization discretization.
Data Processor: Delete Column
This data processor deletes one or more columns. The COLUMN_DELETE data processor deletes a single column when a named column is specified or it deletes multiple columns that matches a pattern if a SELECT clause is used.
COLUMN_DELETE
NAME <column-name>
Data Processor: Create Column
This data processor creates a new empty column. The COLUMN_CREATE data processor creates a single column with the specified name. The create data processor cannot be combined with a SELECT clause.
COLUMN_CREATE
NAME <column-name>
Data Processor: Clone Column
This data processor clones one or more columns. The COLUMN_CLONE data processor takes a single parameter, which determines the name of the clones. When COLUMN_CLONE is combined with at SELECT clause the parameter is used as a prefix on the new names of the cloned columns. Otherwise the parameter is the name of the cloned column.
COLUMN_CLONE
NAME <column-name>
<new column name or prefixes>
When creating the data processor using the guided approach, the column to clone is selected in the dialog in Figure 11 while its name is specified in the dialog in Figure 12.
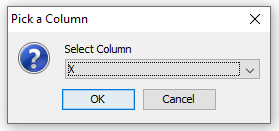
Figure 11: Specify the column to clone.
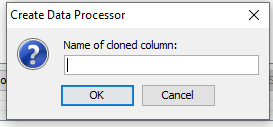
Figure 12: Specify the name of the cloned column.
Data Processor: Shift Column Cells
This data processor shifts the cells of or more columns a specified number of cells up or down. A COLUMN_SHIFT data processor takes two parameters. The first determines the number of rows to shift the cells while the second determines whether to shift the cells up or down. When using the guided approach, the system asks how many rows to shift the cells down. However, by specifying a negative number the cells can be shifted up.
COLUMN_SHIFT
NAME <column-name>
<Number of rows (any integer in the interval ]-∞, ∞[) >
<UP or DOWN>
When creating the data processor using the guided approach, the number of rows to shift the column is selected in the dialog in Figure 13.

Figure 13: Specify the number of rows to shift the selected column.
Selecting Data Processors
A Data Processor is selected by clicking on its description in the ‘Select Data Processors List. Multiple data processors can be selected by holding down the CTRL key while selecting data processors from the list. Note that when multiple data processors are selected, they will be processed in the order they appear in the list from top to bottom. Remember that the arrow buttons ( \(\blacktriangle\) and \(\blacktriangledown\)) allow you to rearrange data processors in the list.
Verify and Preview Data Processors
It is possible to verify and preview the consequences of running the selected preprocessors on your data before actually running them. This is a great help when writing and debugging a data processor description.
The verification tool gives you a summary of what the data processors will do to your data. This option will also give you warnings and error messages if there is anything you should be careful about or if there seems to be an error in your data processors.
To use the verification tool on your data processors, select the desired data processor(s) in the list (see Figure 14), and then click the ‘Verify Selected’ button.

Figure 14: Selecting a data processor - the selected data processor is of type REPLACE
The verification tool reports any errors/partial success and the transformations done by the selected data processor. The result of applying the verification tool can be seen in Figure 15.
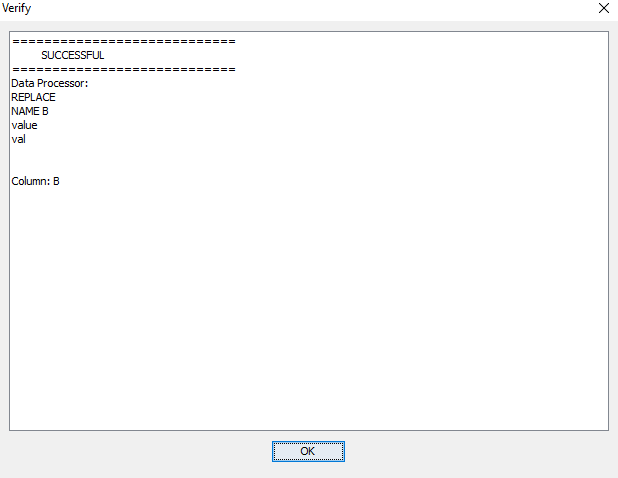
Figure 15: Verification tool result - see how selected data processors performs, inspect errors etc.
The preview tool copies the top 200 rows in the dataset and applies the selected preprocessors on them and displays the result in a new window which can be inspected.
An example of running the preview tool on 4 selected data processors is shown in Figure 16 and Figure 17. First, the window in Figure 16 indicates which processors succeeded and which processors failed.
In this example 3 of the data processors are listed under SUCCESS while 1 data processor is listed under FAILED. The result of running the data processors on the top 200 rows is outlined in the Preview table that follows when pressing ‘OK’ in the Summary window (Figure 16).
Using the verification tool on these 4 processors may indicate the cause of the error. Figure 18 shows that the COLUMN_CREATE processor failed since there were multiple columns named ‘X’.
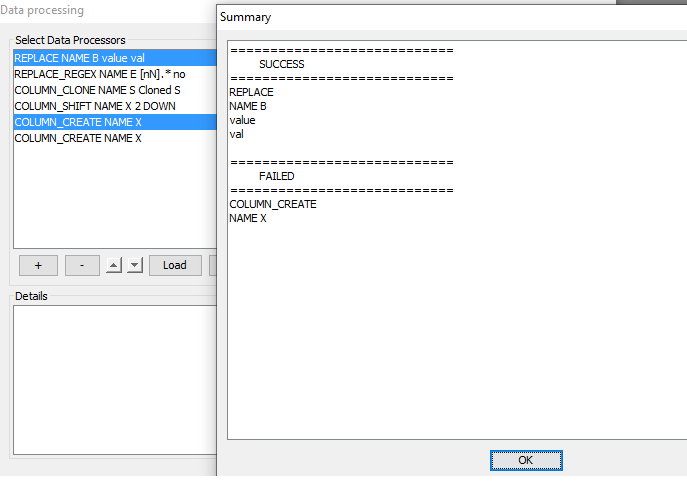
Figure 16: Summary of run of 2 selected data processors. The Summary indicates that the COLUMN_CREATE processor listed under FAILED did not succeed.

Figure 17: Preview of the result of running 2 selected data processors.
Applying Data Processors
To apply a data processor, select the data processor and click the run button. The data processor is applied to the data set, and a window appears with a summary of which data processors succeded and which failed, see Figure 18. If any errors appear, use the preview functionallity for further investigation and debugging.

Figure 18: Summary of run data processors.
