Leave One Out Propagation
Leave-One-Out Propagation is propagation provided within the the Data Matrix tool that allows to perform N-fold Cross Validation where N is the number of cases in the data set used for evaluation of a model.
Requirements
Before the functionality is available the data set must be associated with a compiled network with at least one node with experience tables.
Concepts
Leave-One-Out Propagation works in the following way:
A data set D with cases r1, r2, …, rn.
A Bayesian Network M over the nodes C. Let C’ \(\subseteq\) C be a set of nodes which have experience tables.
For each row i, HUGIN uses the EM-algorithm to learn a model M_i in which the CPTs for C’ are learned from the cases r1, r2,…,ri-1, ri+1,….,rn
Enter the evidence of row ri into M_i and propagate to obtain the desired beliefs.
The desired beliefs are specified in the ‘Configure Batch Propagation’ dialog window.
The rest of this manual page will be a walk through of how to obtain this functionality.
Loading the Bayesian network and Data file
Press Ctrl + O, navigate to the file containing your model and press ‘Open’. If you have not already added Experience tables to the nodes you wish to learn, see Adding experience tables. Compile the model to enter run-mode.
The next step is to open a data file in the Data Frame. By following these links you can read how to:
Configuring Leave-One-Out propagation
After having performed the above steps, right-click on a column header in the data frame window and select ‘Configure batch propagation’ (See Figure 1).

Figure 1: Right-click on a column header in the data frame window and select ‘Configure batch propagation’ to enter the Batch Propagation Dialog.
Mark nodes for classification
Navigate to the ‘Classify/Learn’ tab, click ‘Classify Node’ to configure a node as target for learning and evaluation. The effect of doing this is that the column representing the selected variable will obtain the prefix “[C]” which indicates to the propagation algorithm that data from this coulumn will be included while learning M_i but will not be included while performing the propagation of the data in row i.
If the class variable is not marked, the class variable will be included in the propagation of M_i with row i which results in a wrong evaluation of the classifier.
Figure 2 and Figure 3 shows the dialog for marking a node for classification. Any number of nodes can be marked.
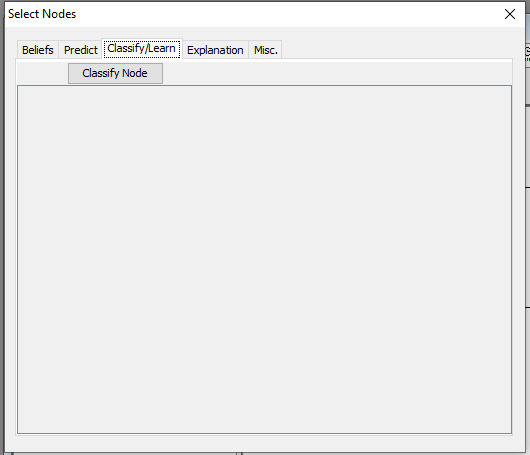
Figure 2: Navigate to the ‘Classify/Learn’ tab.

Figure 3: Click ‘Classify Node’ to mark a node as target for learning and evaluation.
Configure the class variable for monitoring
Navigate to the ‘Beliefs’ tab, click ‘Monitor Node’ to configure a node for monitoring of its beliefs during the propagation.
The effect of doing this is that a number of columns (one column for each selected state) will be added to the data set which will contain the beliefs for the variable being in that state.

Figure 4: Navigate to the ‘Beliefs’ tab, click ‘Monitor Node’ and select the state for monitoring. Select the node twice in the ‘Select Node’ dropdown bar in order to mark all states for monitoring.
The nodes selected for monitoring will be listed in the pane. Add as many nodes for monitoring as you wish.
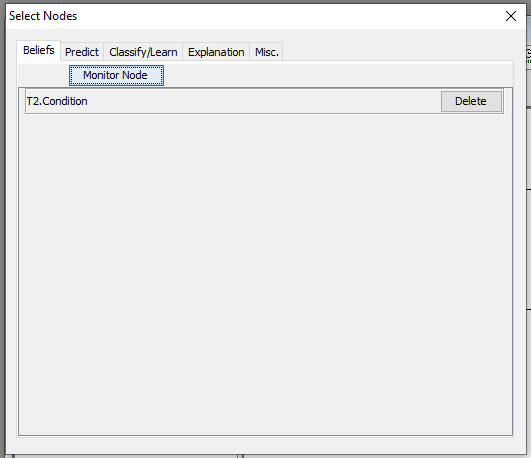
Figure 5: The nodes marked for monitoring are listed. Add as many as you like.
Adding Experience Tables
Experience tables can be added to nodes when the network is in edit mode.
Right-click on the node, select ‘Experience/Fading table operations’ and select ‘Add Experience Table’. (See Figure 6.)
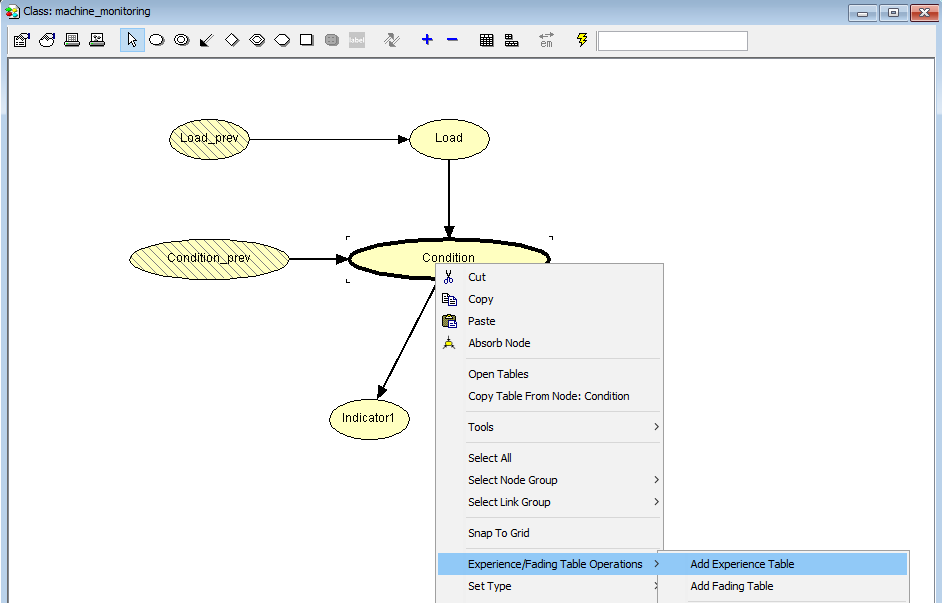
Figure 6: Adding an experience Table.
As initial parameters for the experience table we have here selected ‘User defined value’ and experience count 25. That means that the initial distribution on the nodes will have a weight as if it was based on 25 observations.
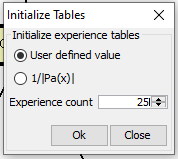
Figure 7: Set initial parameters for experience table.
Add experience tables to all nodes for which you wish to learn the CPT. In order to perform Leave-One-Out cross validation propagation at least one node must have experience table.
Perform Leave-One-Out-Propagation
Close the ‘Select Nodes’ window, right-click on a row-number and select ‘Leave-One-Out Propagate ALL rows’ in order to start the propagation.
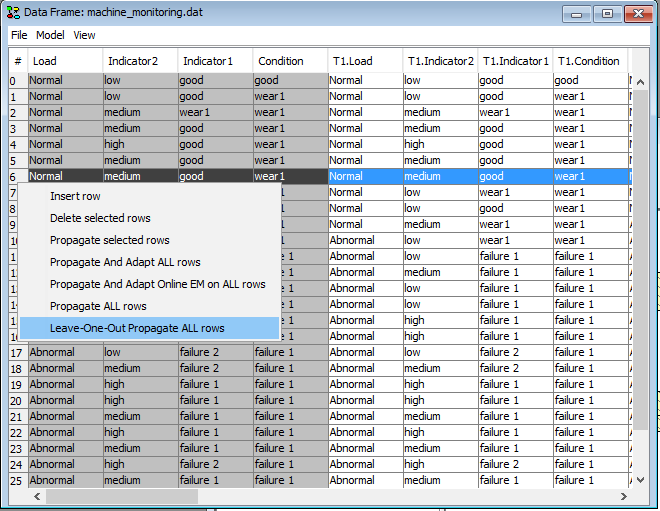
Figure 8: Start the propagation.
Inspect and evaluate the propagated result The propagated beliefs should now be placed in the data matrix. The data can be saved to a file or the Classifier Performance tool can be used to evaluate the classifier performance.
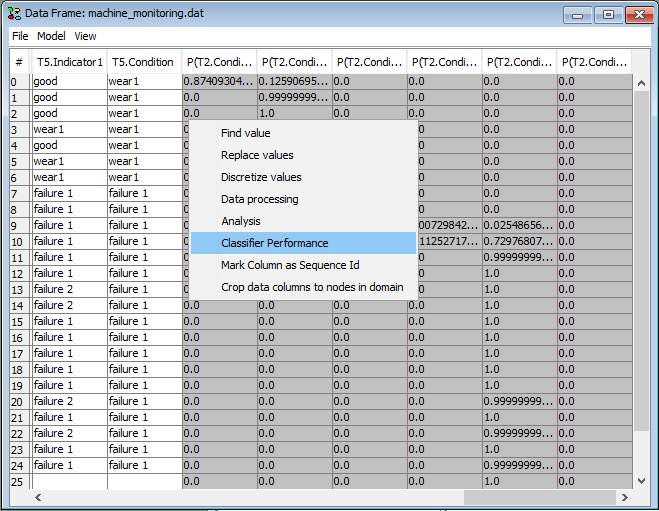
Figure 9: Inspect the propagated beliefs in the data matrix, and use the Classifier Performance tool to evaluate the classifier performance.